Posts

Lab 8.4: Adding a Pane to the Status Bar

Image
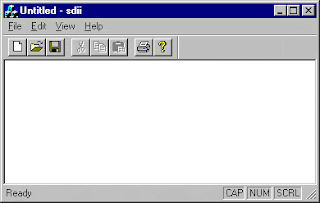
Lab 8.4: Adding a Pane to the Status Bar In this lab, you will add a pane to the status bar that will display the time. Estimated time to complete this lab: 45 minutes To complete the exercises in this lab, you must have the required software. For detailed information about the labs and setup for the labs, see Labs in this course. Objectives After completing this lab, you will be able to: ® Add a pane to a status bar. ® Provide a handler to update the displayed text. Prerequisites There are no prerequisites for this lab. Exercise The following exercise provides practice with the concepts and techniques covered in this chapter: ® Exercise 1: Implementing a Time Pane In this exercise, you will add a new pane to the status bar and set its text to the current time. You will also add a command handler to provide updates to the status bar. ® Exercise 1: Implementing a Time Pane Create a simple SDI application saved as TimeStamp. In this exercise, you will add a new pane

Lab 8.3: Adding a Shortcut menu

Image
Lab 8.3: Adding a Shortcut menu In this lab, you will add a shortcut menu to an application. Estimated time to complete this lab: 30 minutes To complete the exercises in this lab, you must have the required software. For detailed information about the labs and setup for the labs, see Labs in this course. Objectives After completing this lab, you will be able to: ® Add a generic shortcut menu handler from the Component Gallery. ® Modify the menu resources associated with a shortcut menu. ® Process right-click messages to trigger a shortcut menu. ® Process messages sent from a shortcut menu. Prerequisites There are no prerequisites for this lab. Exercise The following exercise provides practice with the concepts and techniques covered in this chapter. ® Exercise 1: Adding a Shortcut Menu Component In this exercise, you will add a shortcut menu to an application using the Component Gallery. Exercise 1: Adding a Shortcut Menu Component The code that forms the basis fo

Lab 8.2: Changing Text in Menu

Image
Lab 8.2: Changing Text in Menu In this lab, you will extend menu functionality. You will toggle the text of a menu based on the state of the application. You will also coordinate the menus and toolbars based on the state of a feature of the application. To see a demonstration of the lab solution, click this icon. Estimated time to complete this lab: 30 minutes To complete the exercises in this lab, you must have the required software. For detailed information about the labs and setup for the labs, see Labs in this course. Objectives After completing this lab, you will be able to: ® Edit a menu resource. ® Use ClassWizard to add COMMAND handlers. ® Implement handlers. ® Use ClassWizard to add UPDATE_COMMAND_UI handlers. ® Add buttons to the toolbar. ® Add and implement COMMAND and UPDATE_COMMAND_UI handlers. Prerequisites Before working on this lab, you should be familiar with the following: ® How to add a menu, a submenu, and menu functionality to an MFC applica

Implementing State Indicators

Image
Exercise 2: Implementing State Indicators Continue with the files you created in Exercise 1, or if you do not have a starting point for this exercise, the code that forms the basis for this exercise is in \Labs\Ch08\Lab01\Ex01. The menu items you added are now functional. However, the user has no indication of the pen width without drawing a line. The easiest way to indicate the state of an option is to use radio button marks or check marks. Because the user can only choose between the two options of thick and thin pens, you will add a radio button as the indicator of the pen width. Use ClassWizard to add UPDATE _COMMAND_UI handlers for Thick and Thin menu items 1. On the View menu, click ClassWizard , or press CTRL+W. 2. Select the CScribbleDoc class and select the object ID ID_PEN_WIDTH_THICK. 3. Select the UPDATE _COMMAND_UI message. 4. Click Add Function and accept the default function name. 5. Repeat the previous steps for ID_PEN_WIDTH_THIN. Implement th

Adding Static Drop-down Menus

Image
Lab 8.1: Adding Static Drop-down Menus In this lab, you will add functionality to the Scribble application. Using the Menu editor, you will provide a top-level menu and submenu that enable the user to set the width of the drawing pen. You will then add a radio button indicator to show the state of a menu item. The following illustration shows you what the complete lab should look like. To see a demonstration of the lab solution, click this icon. Estimated time to complete this lab: 30 minutes To complete the exercises in this lab, you must have the required software. For detailed information about the labs and setup for the labs, see Labs in this course. Objectives After completing this lab, you will be able to: ® Edit a menu resource. ® Use ClassWizard to add COMMAND handlers. ® Implement handlers. ® Use ClassWizard to add UPDATE_COMMAND_UI handlers. ® Set radio button or check box indicators in menus. ® Add buttons to the toolbar. Prerequisites Before working

StatusBar in visual basics

Image
StatusBar Status bars appear at the bottom of the application screen as a series of panes. These panes display information, usually in the form of text strings, although graphics can also be displayed. To see a sample SDI application window with a status bar at the bottom, click this icon. This section includes the following topics: ® Introduction to Status Bars ® Specifying Status Bars in AppWizard ® Adding a Pane to the Status Bar ® Displaying Status Bar States Introduction to Status Bars The default status bar displays the status of the CAPS LOCK key, the NUM LOCK key, and the SCROLL LOCK key. When the user clicks a menu item or toolbar button in an application, the status bar displays menu prompts that describe the basic functionality of the selected item. Status bars are created from the CStatusBar class and take an array of IDs, one ID for each of the panes it contains. When you create an application in AppWizard and select Initial status bar in Step 4, A

Toolbars in visual basics

Image
Toolbars A toolbar is a window that contains one or more rows of command buttons. These buttons provide a visual method by which the user can perform specific tasks that can also be performed through the menus in the application. Because toolbar buttons are visual representations of menu commands, toolbars mimic much of the behavior and implementation of menus. Toolbar button graphics are based on a single bitmap that contains a row of button images. The following illustration shows a sample toolbar. When you create an application using AppWizard, Step 4 of the creation process enables you to specify whether you want the default toolbar (IDR_MAINFRAME) added to your MFC-based application. If you choose the default toolbar, the MFC framework adds the toolbar and the default functionality. This section includes the following topics: ® Modifying the Toolbar ® Implementing Toolbar Buttons ® Displaying Toolbar States ® Toolbars and ToolTips Modifying the Toolbar You use