Posts

Using Common Dialog Boxes

Image
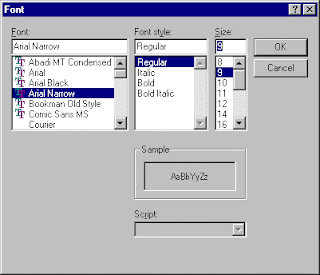
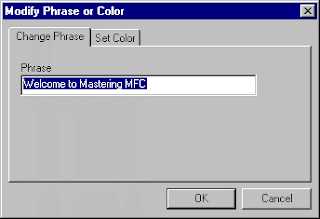
Lab 9.2: Using Common Dialog Boxes In this lab, you will add functionality to an application using the custom dialog box. Estimated time to complete this lab: 15 minutes To complete the exercises in this lab, you must have the required software. For detailed information about the labs and setup for the labs, see Labs in this course. Objectives After completing this lab, you will be able to: ® Use a common font dialog box in an application. ® Use a common color selection dialog box in an application. ® Modify the color and font in CRichEditView . Prerequisites There are no prerequisites for this lab. Exercises The following exercises provide practice with the concepts and techniques covered in this chapter. ® Exercise 1: Adding a Font Dialog Box In this exercise, you will add a font dialog box to an application. ® Exercise 2: Adding a Color Selection Dialog Box In this exercise, you will add a color-choice dialog box to an application. Exercise 1: Adding a Font Di

Implementing a Modal Dialog Box in an Application

Exercise 4: Implementing a Modal Dialog Box in an Application Continue with the files you created in Exercise 3, or if you do not have a starting point for this exercise, the code that forms the basis for this exercise is in \Labs\Ch09\Lab01\Ex03. In this exercise, you will write the code that implements the functionality of the dialog box. Get values from the edit controls In this step, you will create two CDlgOpenFiles member functions, GetFile1 and GetFile2 , that return the contents of the edit controls. 1. At the bottom of the CDlgOpenFiles class definition in DlgOpenF.h, add an attributes section and declare two public methods. // attributes public: void GetFile1 (CString& rFile); void GetFile2 (CString& rFile); 2. Save DlgOpenF.h. 3. In DlgOpenF.cpp, implement the methods to set rFile to the corresponding edit control members. void CDlgOpenFiles::GetFile1(CString& rFile) { rFile = m_File1; }

Lab 9.1 Modifying Resources and Adding Dixes

Image
Lab 9.1 Modifying Resources and Adding Dixes In this lab, you will add a dialog box resource to an application, and include dialog data exchange (DDX) and dialog data validation (DDV). You will also use the resource editor to modify the menus and toolbar. Estimated time to complete this lab: 60 minutes To complete the exercises in this lab, you must have the required software. For detailed information about the labs and setup for the labs, see Labs in this course. Objectives After completing this lab, you will be able to: ® Create a dialog box template. ® Build a new class based on that template. ® Remove unused menu and toolbar items. ® Add an error string to the string table . ® Write code to handle a modal dialog box within an application. ® Use the new dialog class in an application. Prerequisites There are no prerequisites for this lab. Exercises The following exercises provide practice with the concepts and techniques covered in this chapter. Exercis

Using List Boxes

Image
Using List Boxes This section describes how to initialize and retrieve information from list boxes, and how to use list boxes in advanced ways. The controls introduced in earlier sections of this chapter are very simple. They represent a single piece of information whose value you want to get or set. Interaction with these controls can be limited to DDX through a single dialog class data member. Because the nature of list boxes is more complicated, it is often necessary to add a control variable to the dialog box class. This control variable allows easy initialization and enables you to call all the member functions of the list box class. ClassWizard creates this control variable for you. Because the list boxes must be preloaded with information, the CDialog::OnInitDialog function is often overridden. This section explains how to write code to use these complex controls in list boxes. This section includes the following topics: Initializing a List Box When ClassWizard

Creating an Instance of the Dialog Box Class

Image
Creating an Instance of the Dialog Box Class The final step for creating a dialog box is writing the code to create an instance of the dialog box class. To create an instance of a dialog box class 1. Include the dialog class's header file. 2. Create the dialog box object. 3. Initialize the data members in the dialog box. 4. Display the dialog box. 5. Use the data from the data members in the dialog box. The include statement follows: #include "Dialogs.h" The following code sample shows you how to create, initialize, display, and use the data in a modal dialog box. void CDialog1View::OnModifyShowdialog() { CDialog1Doc* pDoc = GetDocument(); ASSERT_VALID(pDoc); // Create the dialog box object CColorPhraseDlg dlg; // Load the dialog box's members before // displaying it. dlg.m_phrase = pDoc->GetPhrase(); dlg.m_color = RgbToInt(pDoc->GetColor());

Designing and Creating Dialog Boxes

Image
Designing and Creating Dialog Boxes This section describes dialog box architecture and the types of dialog boxes, and how to design, build , and test a dialog box. First, you will learn how to add controls to a dialog box resource using the Dialog editor. Then you will be introduced to the primary properties of most of the controls found in dialog boxes. Finally, you will learn how to test dialog boxes during development. This section includes the following topics: Dialog Box Architecture Before building dialog boxes, you need to understand how they work. Data for dialog boxes comes from three sources: a dialog box resource , a dialogbox object , and a document object . To see an illustration of the dialog box architecture, click this icon. The purposes of the dialog box resource, dialog box object, and document object can be described as follows: ® A dialog box is a graphical object that gets data from, and gives data to, the user. This graphical interface is created

Chapter 9: Creating and Using Dialog Boxes

Chapter 9: Creating and Using Dialog Boxes Windows-based applications get information from and give information to the user through the dialog box . This chapter covers techniques for creating and managing dialog boxes in the Windows operating system. First, the chapter covers dialog box design, such as adding controls, setting properties, and defining how the user moves within the dialog box. Next, the chapter discusses how to use ClassWizard to add and complete the code that actually implements the dialog box and enables its controls, including how to handle user input. The chapter then explains how to create an instance of the class. Objectives After completing this chapter, you will be able to: ® Define the different types of dialog boxes. ® Explain how dialog boxes are built by using the Microsoft Foundation Class Library . ® Use the Dialog editor to create a dialog box template . ® Use ClassWizard to create dialog box classes. ® Write code to